How To Add a Concept
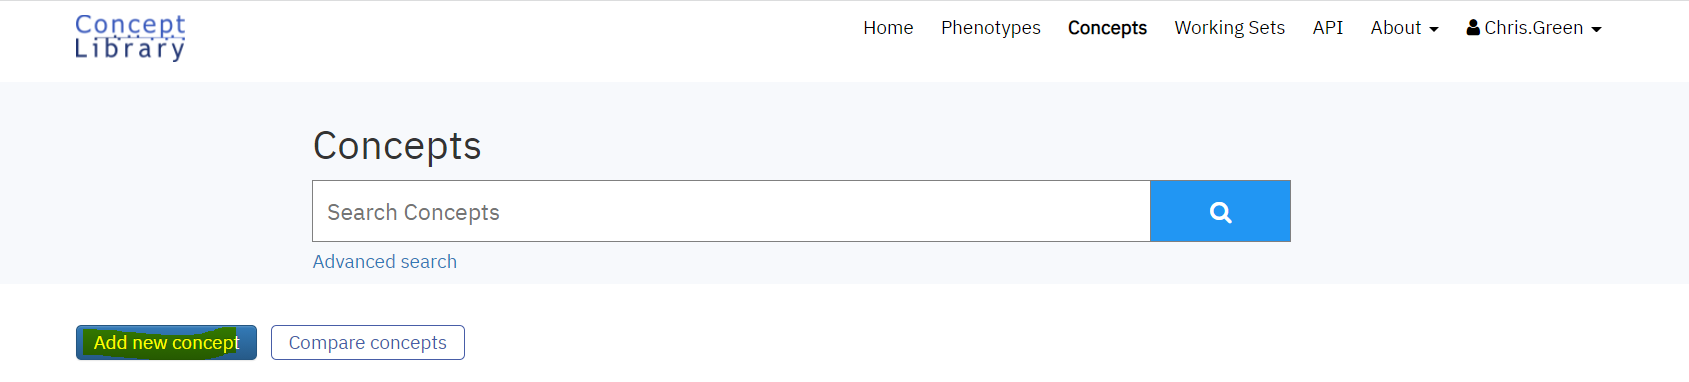
New concepts can be added within the "Concepts" tab of the Concept Library.,
To add a new concept, click the "Add new concept" button:
The User will be presented with a blank Concept form which will capture all of the details about the proposed concept.
All mandatory fields are highlighted with a *.
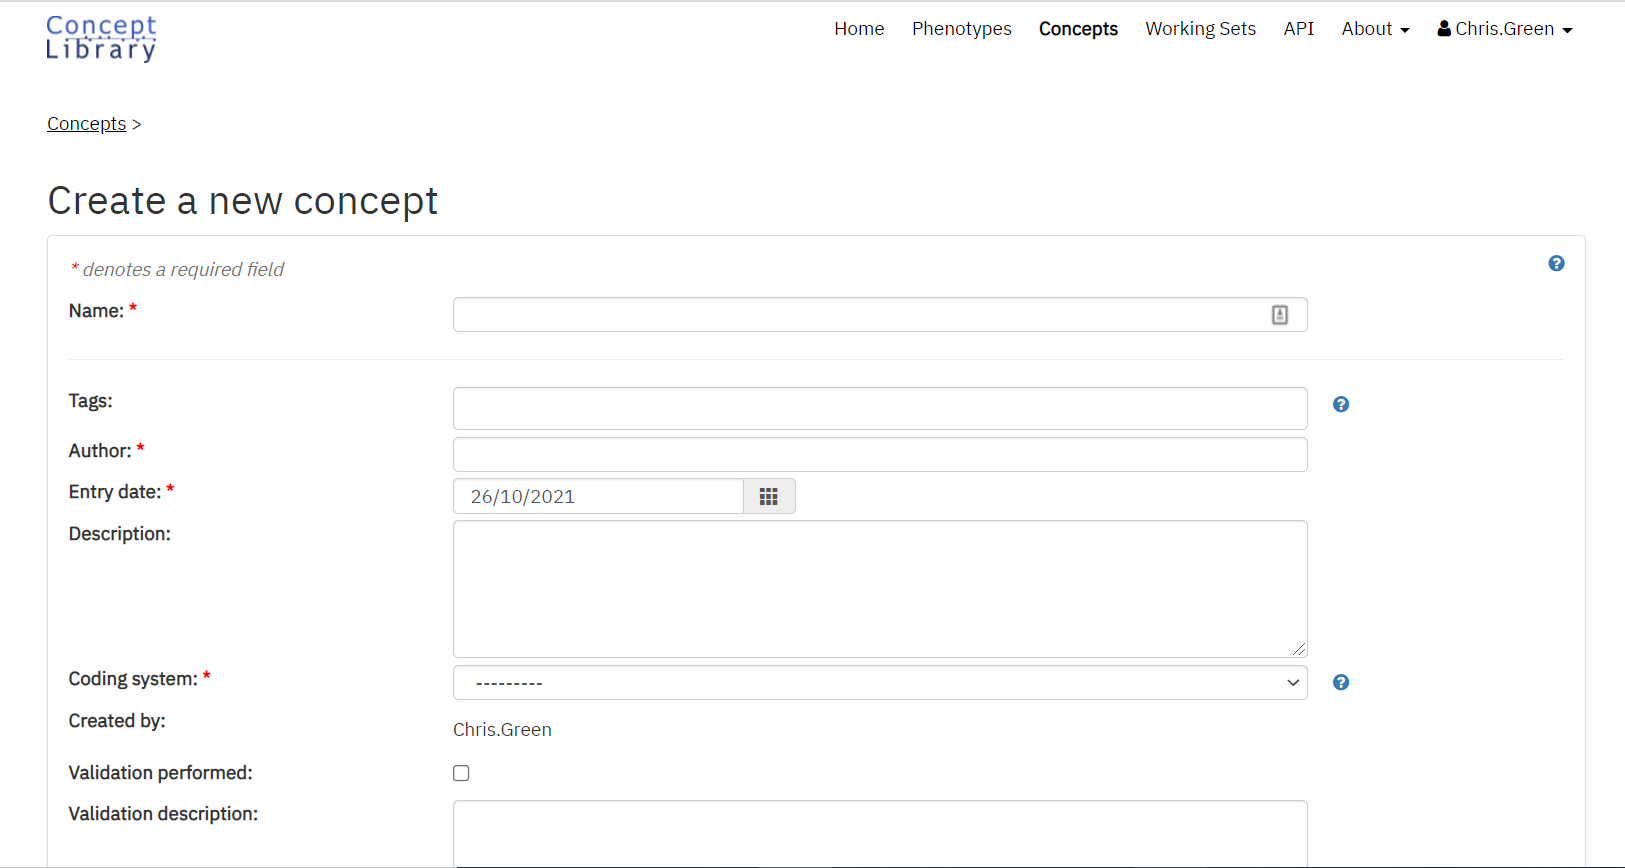
The first section of the form covers the Concept name.
The second section of the form covers documentation items describing the meaning, authorship, validation, etc. of the concept. This section must be completed and saved, with at least the mandatory fields ( * ) filled in, before any codes can be added to the concept.
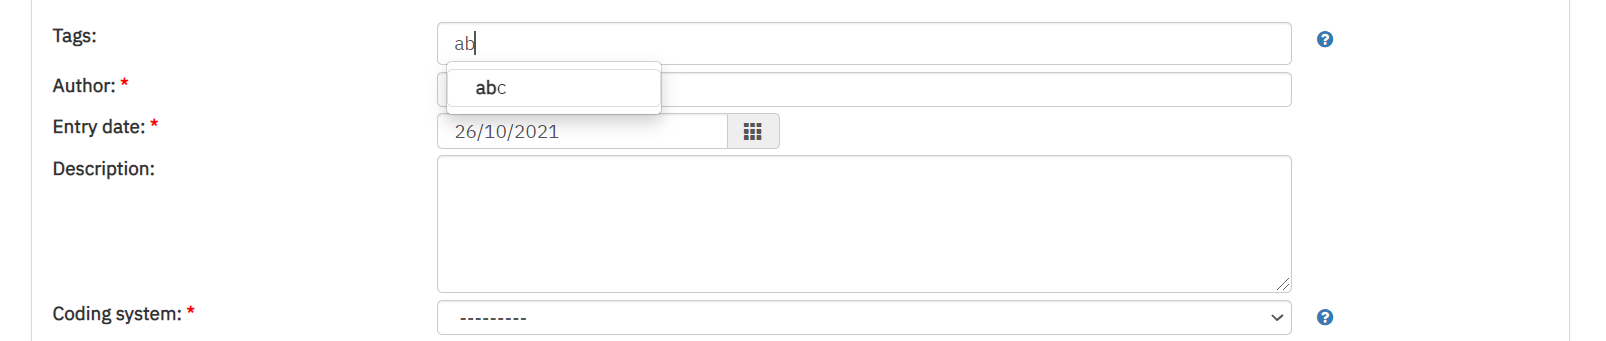
Tags can also be added in order to group or associate multiple concepts. A tag must be valid and must already exist in the system for it to be visible. Typing in the tag field will provide an auto populated list which will display all valid tags relevant to that being entered. A tag can then be selected from the dropdown list.
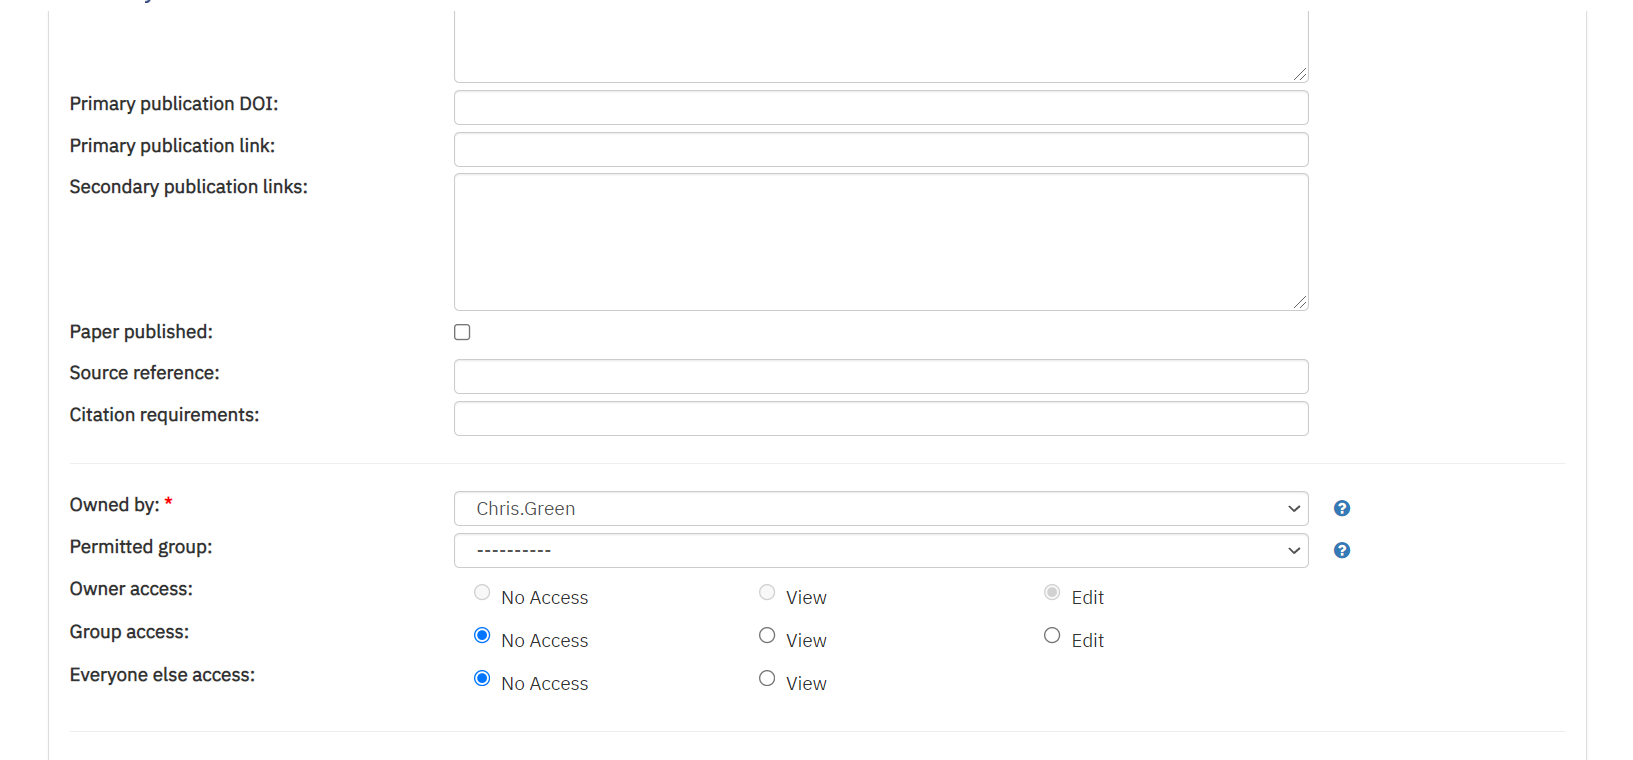
The third section covers permissions. This section will show who created the concept and, therefore, who owns it. Only the owner can modify permissions on a concept. There can be only one owner of a concept, but the owner has the ability to assign ownership to someone else. This may be useful if they are no longer actively involved in working on it.
A concept can also be associated with a group. Groups can be set up for a project that wants to work together and share concepts within their team, but does not want to share the work more widely yet. Groups are currently set up manually by the Concept Library administrators. Please contact us via the SAIL Helpdesk if you would like a concept library group set up.
The owner always has full access to the concept and the owner can also choose to assign view or edit permissions to the group (if applicable), as well as everyone. Note that "everyone" means everyone with a log in to the Concept Library tool. This does not make the concept publicly available on the web. In the future, we plan to create a way to publish concepts on the web, but it won't be via this "everyone" permission setting. It will be a new feature, and all users will have the chance to make a decision on what material to publish.
Changes to permissions apply to all versions of a concept. If you previously shared your concept, but then remove this access, all previous versions are no longer visible within the library. (Of course, someone may have already downloaded and used the concept, something that the tool cannot prevent).
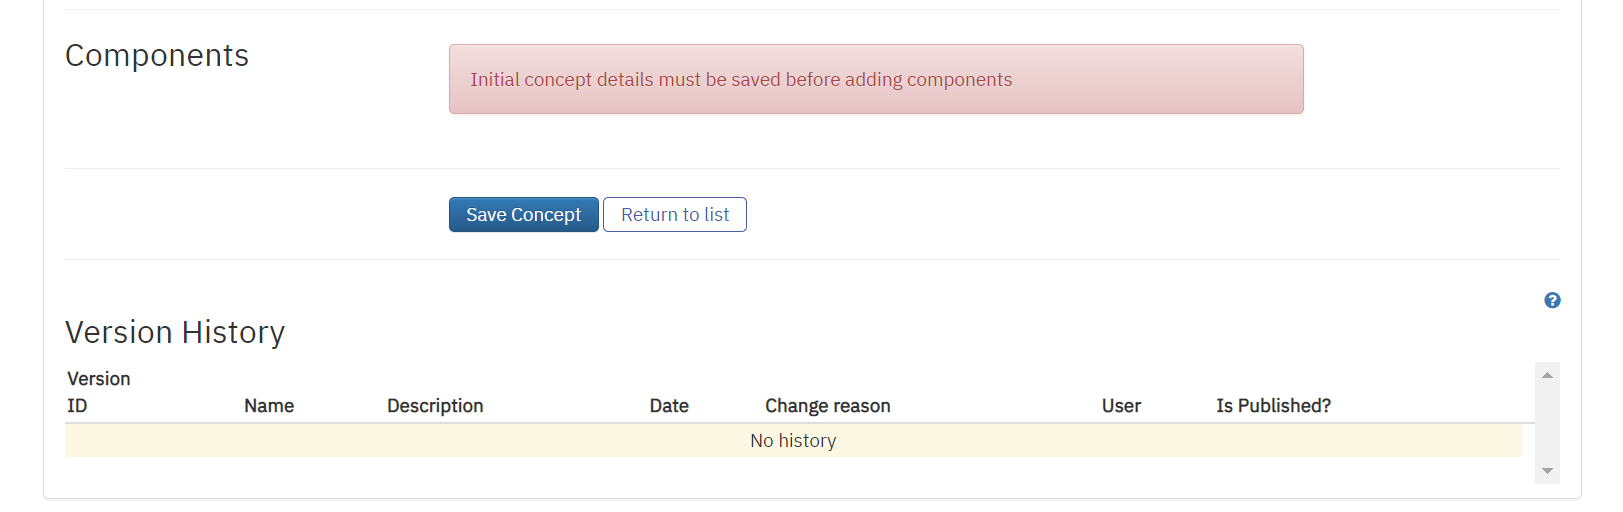
The Concept needs to be saved before adding any components. - click the Save Concept button ![]()
The following message is then displayed: 
Components: Adding Codes
Once the basic documentation is saved components can then be added via the Add button which is now displayed.
Each component will have the attribute "Add Code / Remove Code" which means add/remove the component's code from the final concept code list. If a code is under "Remove Code" once and under "Add Code" many times, it will be excluded from the final code list.
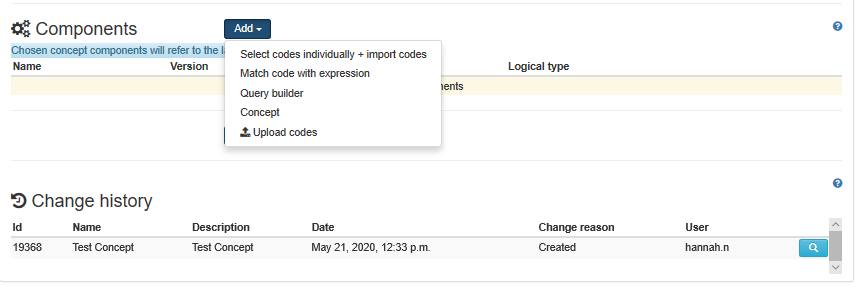
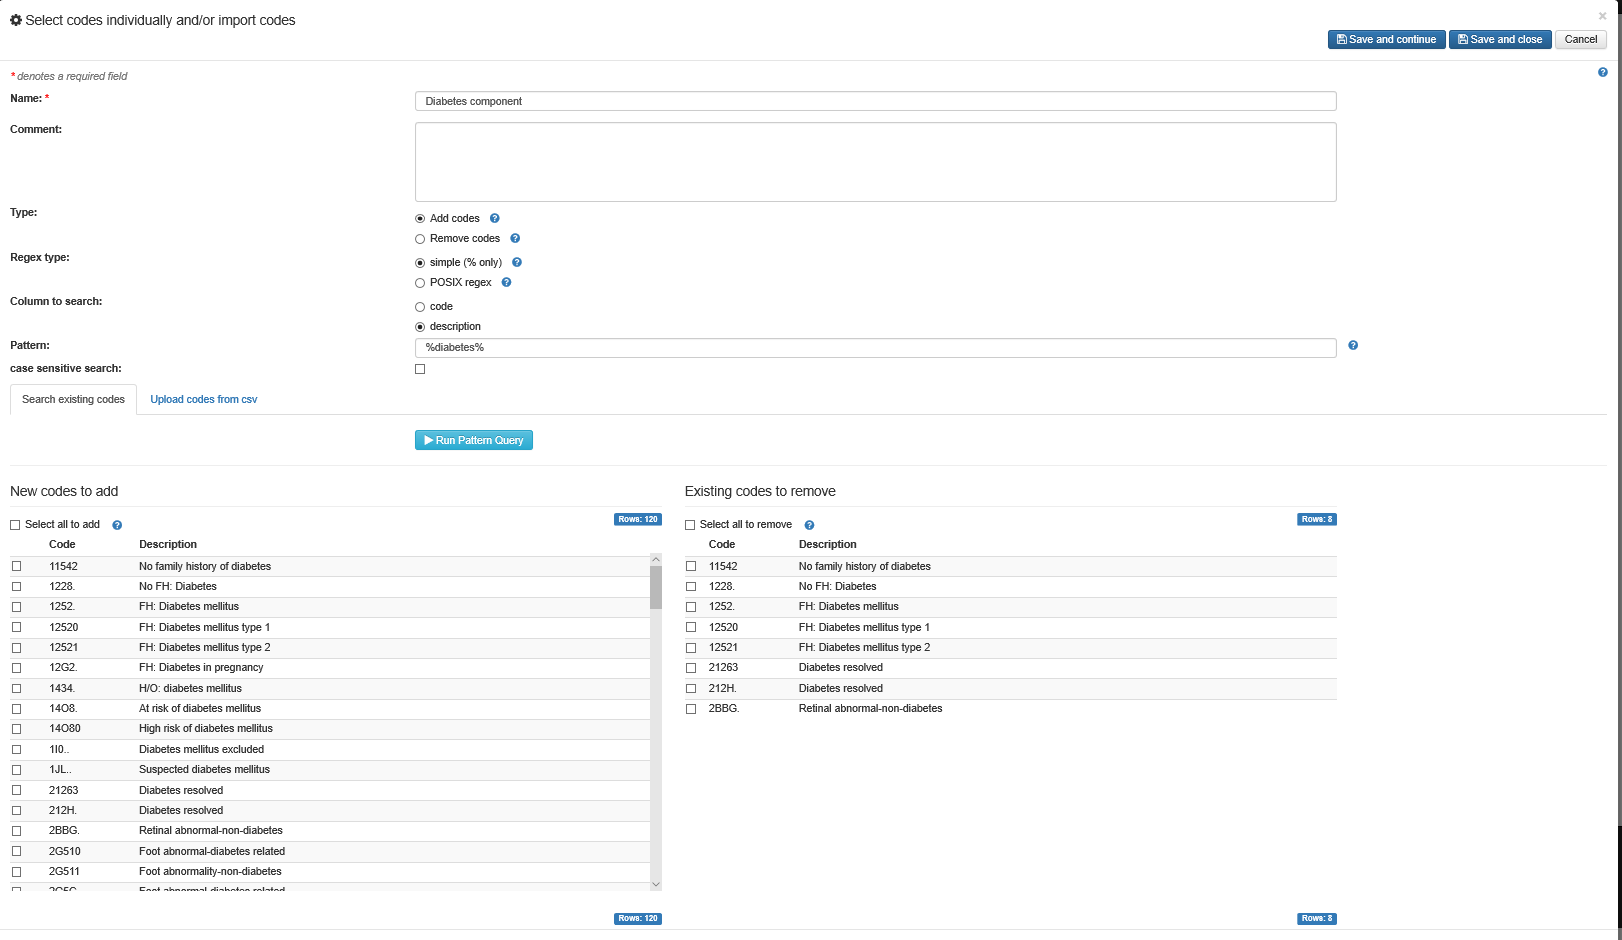
1) Select codes individually + import codes - This type allows the user to manually select which codes will be added. This is done either by a search for codes, and then selecting which codes from the search results to include; or by uploading a CSV.
- Search existing codes tab - this allows searching either the code or the description. Two types of search are allowed.
- Simple search implements a syntax like SQL like. % matches any characters, while _ matches any one character. To search for a string containing a particular word, use an expression such as %diabetes%. Simply searching for "diabetes" will only match a field whose exact contents is just the word diabetes. More information on SQL Like can be found here (the section on "Like" only).
- POSIX regex implements a full (POSIX extended) regular expression syntax, allowing matching by powerful, flexible rules. There are many documentation and tutorial resources online for regexes. Wikipedia's summary is a useful starting point.
- Once information entered click the
 button and the results will be displayed
 button.
- Search existing codes tab - this allows searching either the code or the description. Two types of search are allowed.

- Upload codes from CSV tab - Click on the upload CSV tab, and you can select and load a CSV file with two columns (code and description). You can also select whether the file has column headings (which will exclude the first row).

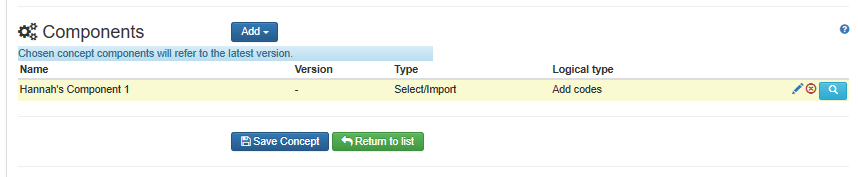
Once saved the user is returned to the Concept page and the component has been added to the concept.
The user can update the component and rerun search to add new codes, upload another csv and remove some older codes
2) Expression match - This type also allows finding codes by a search, as described in the previous section, but all codes that match the search will be included. If you do want to include all codes that match, using this type is preferable, as it will result in a simpler rule defining your concept
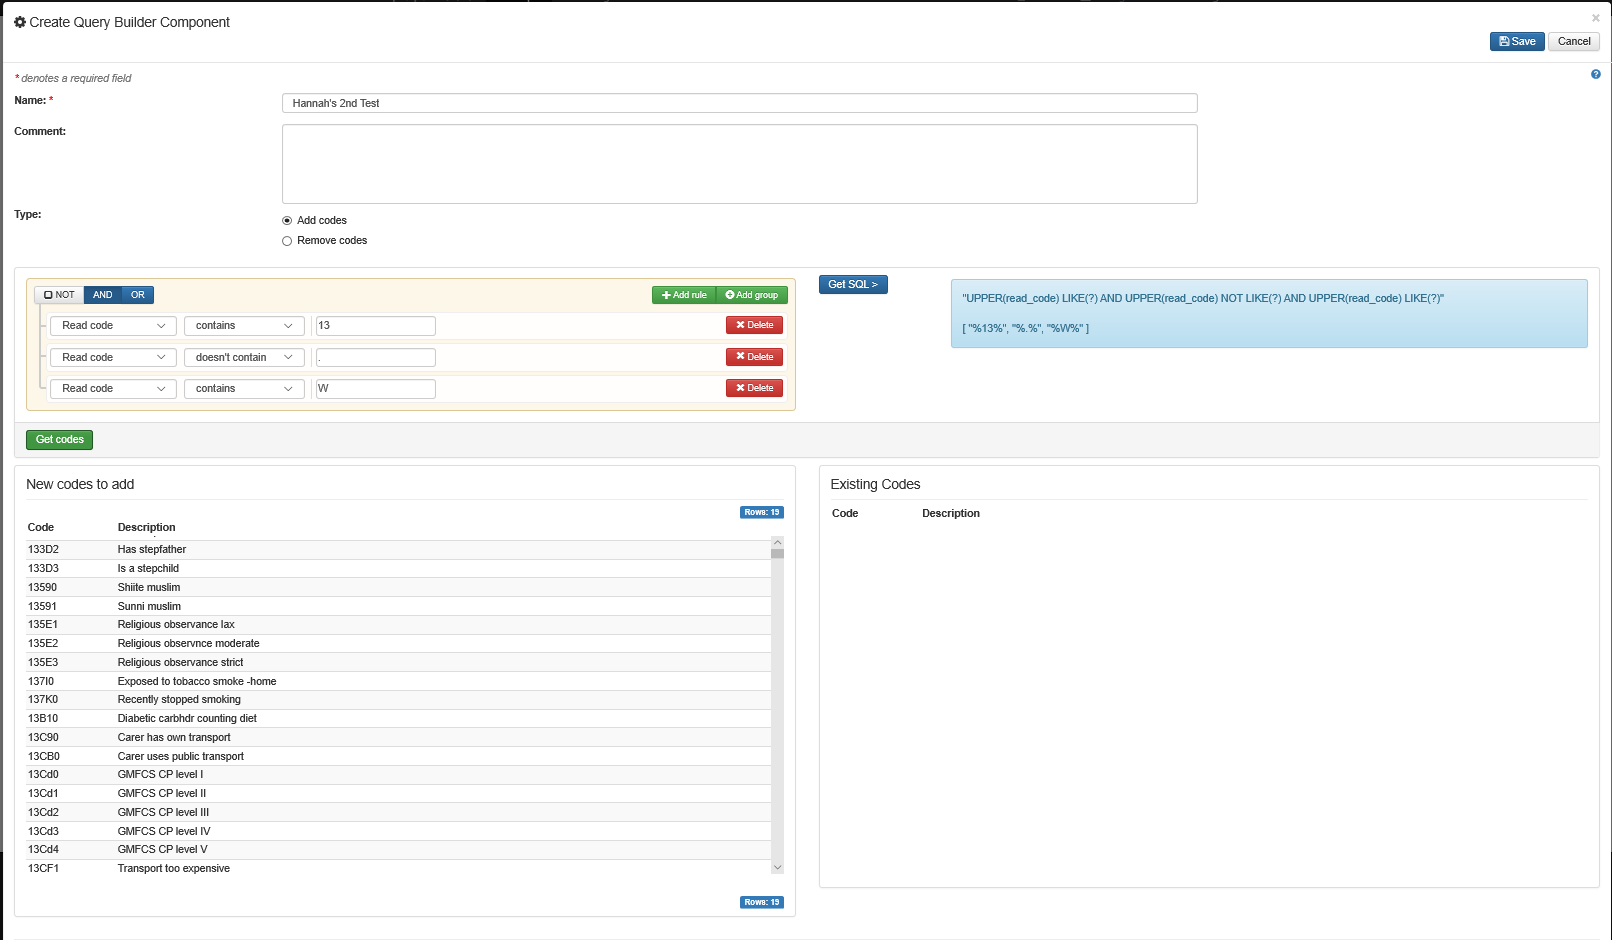
3) Query builder - With this type, multiple rules that define a concept can be entered. The rules can be logically combined with AND and OR, as well as negated with NOT. The drop down box allows you to select any column in the lookup table to apply rules to. Future development will provide more information on what the lookup table contains, in order to make this more useful. "Add group" adds another level in the logic (similar to adding parentheses in a logical statement). "Get SQL" shows you the equivalent SQL where clause to the rules that have been defined, while "get codes" applies the search and actually looks for codes.
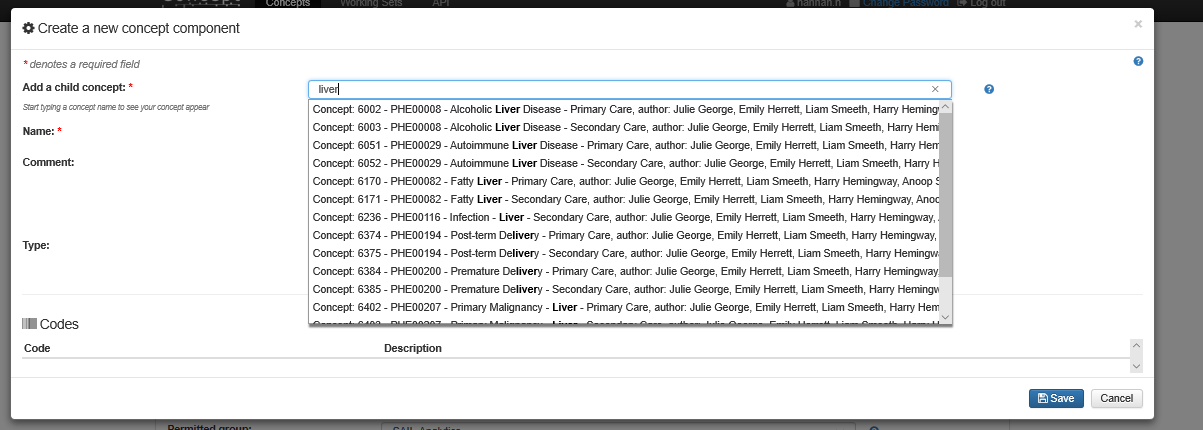
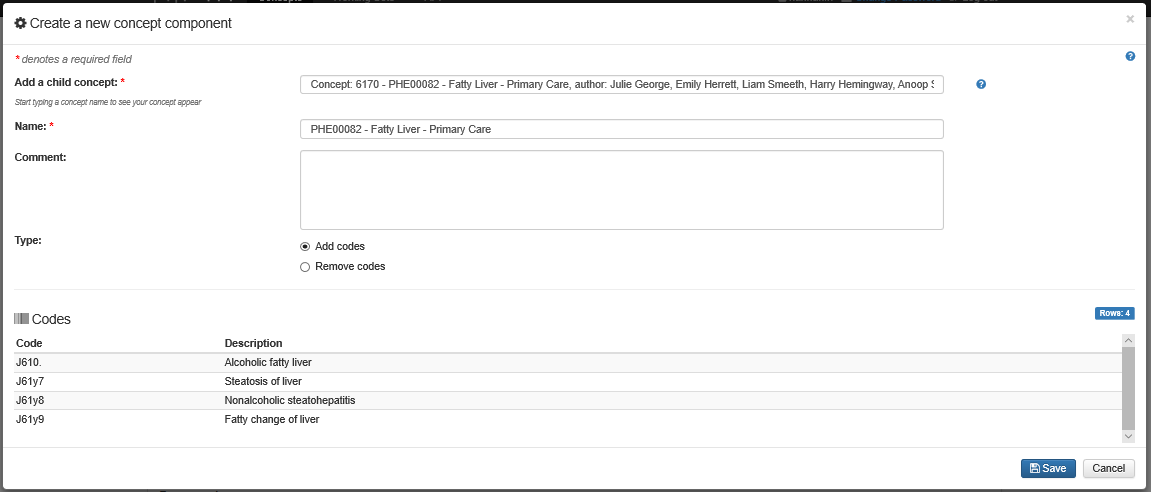
4) Concept - A concept can include codes from one or more other concepts, allowing hierarchical relationships to be defined (for example, an "Any Diabetes" concept could be defined which includes concepts for type 1 diabetes, type 2 diabetes, etc.). This type provides a search field to find existing concepts to add, with autocomplete (only showing concepts you have access to). However, it may be useful to first browse the concepts to find the one you want (noting the ID if there are several similar concepts), before adding it here.
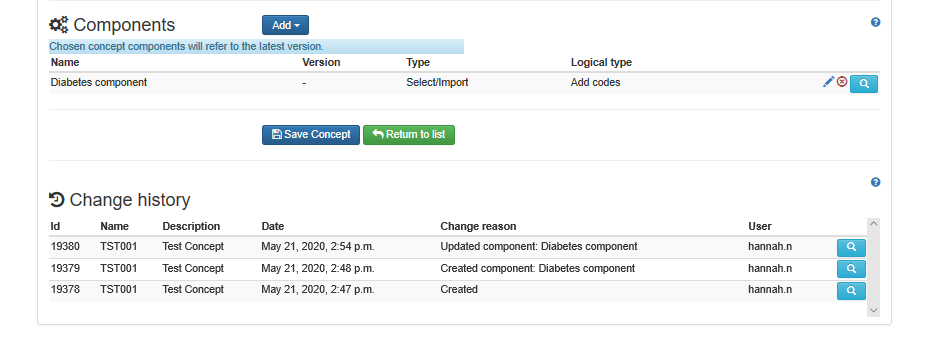
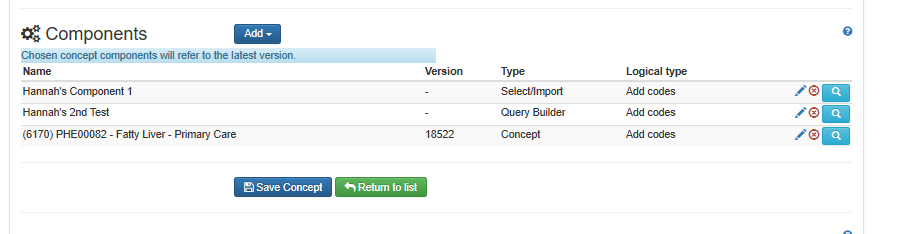
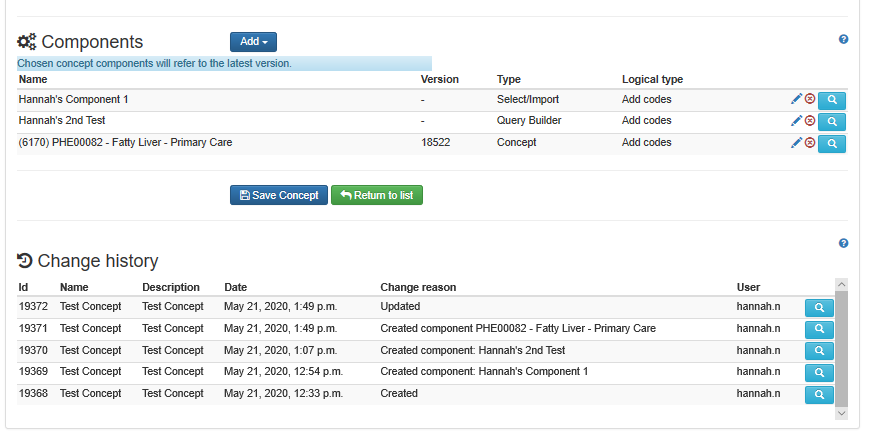
The below example shows multiple components having been added to a Concept
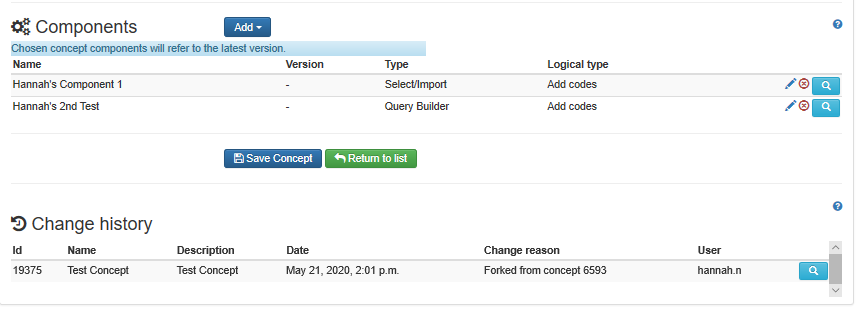
A version of the concept is saved automatically each time a component is added; it's not necessary to click the save concept button again after creating components.
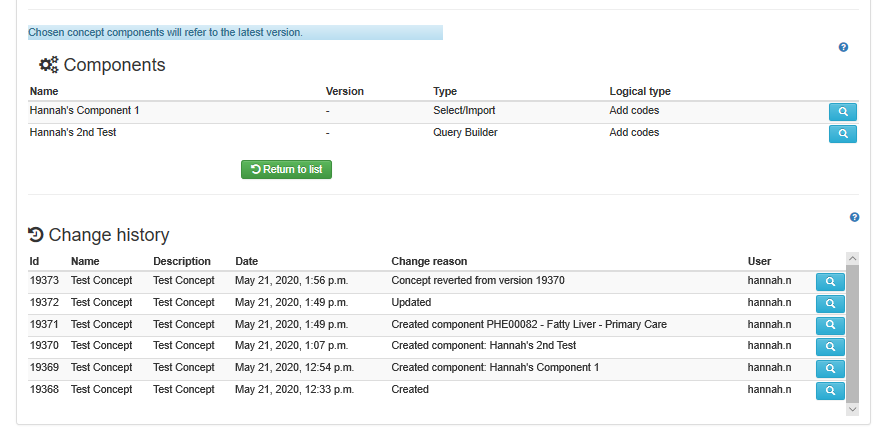
Change History
Every time you make a change and save a component or the overall concept, a new version is generated in the change history. You can view versions by clicking on the magnifying glass in the history. It is also possible to view previous versions of a concept and to download and use the codes.
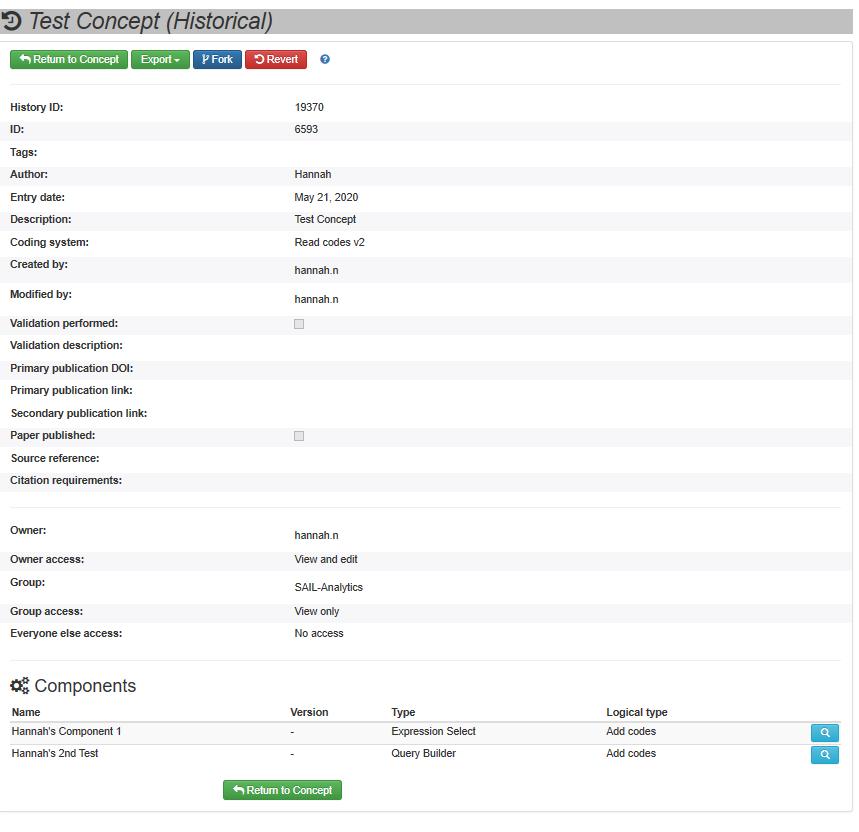
It is also possible to return to an older version of the concept by using the "revert" button in the historical view. This creates a new, latest version that is identical to the older version. this does not wipe out any of the history of what you have done.
It is not possible to edit an older version: first you must revert to make it the latest, and then it can be worked on again as normal..
Reverting back to the concept History ID 19370 without PHE00082 added. Open version 19370 using the magnifying glass against the version
Click on the ![]() button and the following screen is displayed:
button and the following screen is displayed:
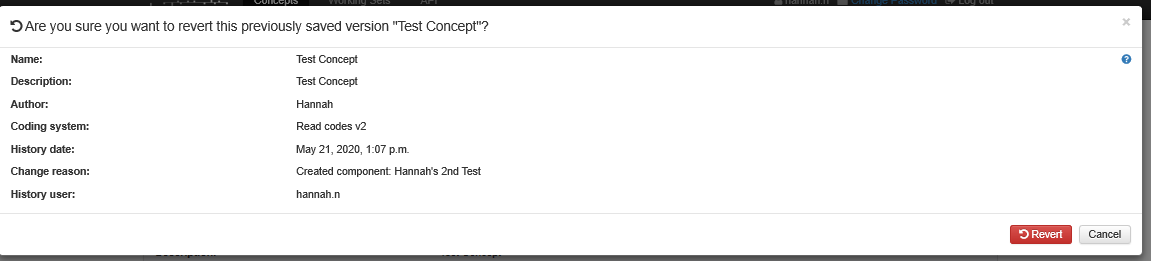
Click on ![]() button again and message indicating that the revert has been successful.
button again and message indicating that the revert has been successful.

Fork
Any user who has permission to view a concept can copy it to a new, identical concept using the ![]() button (this can be done either to the latest version or an older version of a concept). When fork is selected the user is presented with the below screen
button (this can be done either to the latest version or an older version of a concept). When fork is selected the user is presented with the below screen

Clicking Fork again will create a copy and the message below will be displayed following successful copy completion.
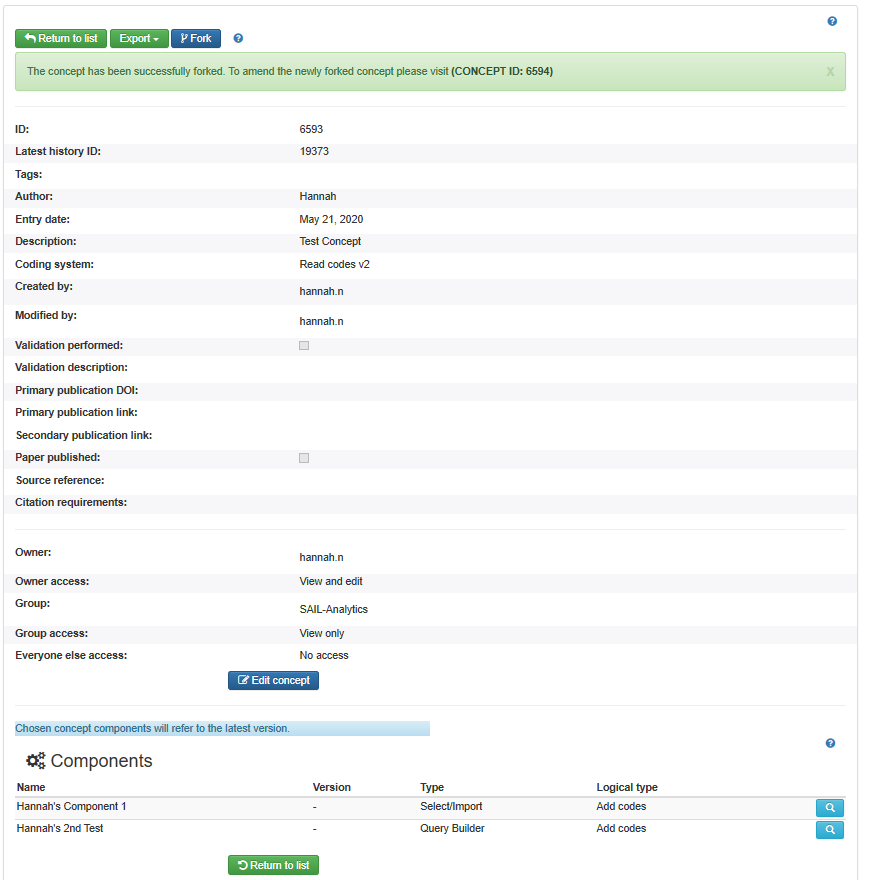
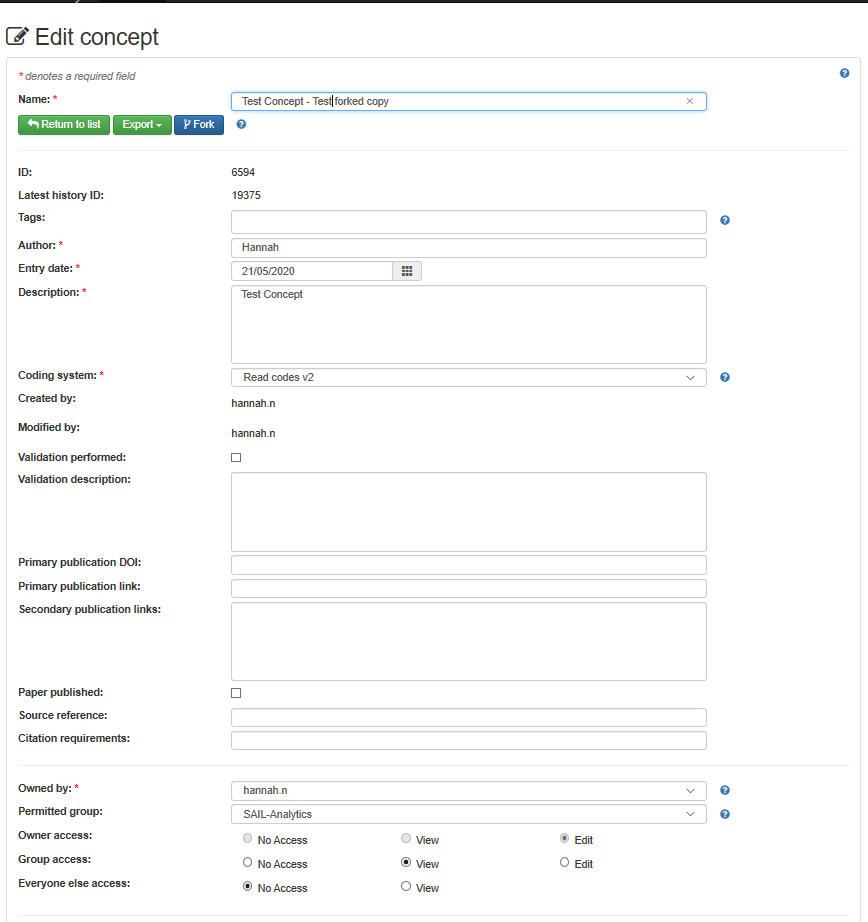
The Concept ID in the message is a hyperlink so clicking on the new Concept ID will open the new version in Edit mode allowing for Concept Name etc to be updated
How To Edit a Concept
An existing concept (which you have permission to edit) may be edited by clicking the pencil button in its row, or clicking the edit button after viewing the concept.
![]()
Once in edit mode, user is able to update any aspect of the Concept including the components. Clicking on the pencil next to the component will allow the user to edit the components allowing additional codes to be added or for some to be removed.
Once Updated and saved, a new version of the Concept is created